How To Change Transmission Fluid - A Step-By-Step Guide
Table of Contents
- Importance of Transmission Fluid Maintenance
- What You’ll Need for a Transmission Fluid Change
- Preparing Your Vehicle for a Transmission Fluid Change
- The Process of Changing Transmission Fluid
- Step 1: Locate the Transmission Fluid Pan and Drain Plug
- Step 2: Drain the Old Transmission Fluid
- Step 3: Clean the Transmission Fluid Pan and Magnet
- Step 4: Install the New Transmission Filter
- Step 5: Reinstall the Transmission Fluid Pan and Tighten the Bolts
- Step 6: Refill the Transmission with New Fluid
- Step 7: Check the Transmission Fluid Level and Adjust if Necessary
- Step 8: Test Drive and Verify Proper Transmission Operation
- Tips and Precautions for Changing Transmission Fluid
- Where can you Buy Engine Part in Dubai?
Importance of Transmission Fluid Maintenance
For the transmission system in your car to function smoothly and last a long time, it is essential to maintain the transmission fluid properly. In addition to lubricating the transmission parts and minimizing friction, transmission fluid also transfers power.
Debris, worn-out components, and heat can pollute the fluid over time, resulting in diminished performance and potential transmission damage. Changing the transmission fluid regularly is essential to ensure maximum performance, better shifting, and a longer transmission lifespan.
We’ll walk you through the procedure for replacing your transmission fluid in our step-by-step manual so you can take charge of this critical maintenance job.
Recommend Read: How does a Car Water Pump work?
Gathering the Tools and Materials: What You'll Need for a Transmission Fluid Change
Gathering all the required tools and materials before changing your transmission fluid is essential. The process will go faster and without interruptions if everything is ready.Here is a list of what you’ll require:
1. Transmission Fluid
To find out what kind and how much transmission fluid is needed, consult the owner’s manual for your car.
2. Drain Pan
A sizable, shallow container catches the drained old transmission fluid.
3. Socket and a Rachet
The gearbox pan bolts can be loosened and removed with a socket set and ratchet.
4. Gasket or a sealer
To achieve a perfect seal when reattaching the transmission pan, you might require a new gasket or sealer, depending on your vehicle.
5. Funnel
Pour the fresh transmission fluid into the transmission using a funnel.
6. Safety gear
Wearing safety goggles and gloves is crucial for protecting yourself from any possible splashes or spills.
7. Jack and Jack stand
You will need a jack and jack stand to safely and securely elevate your vehicle.
You’ll have everything you need to effectively accomplish the transmission fluid replacement by gathering this equipment and materials in advance, enabling a quick and easy procedure.
Preparing Your Vehicle for a Transmission Fluid Change
Setting up the car before replacing the transmission fluid is essential to guarantee a smooth and effective process. Here’s what you should do:
1. Park on a Level Surface
Look for a flat, level place to leave your car. This guarantees accuracy in fluid level readings and encourages procedure safety.
2. Engage the parking brake.
Use the parking brake to stop any unintentional movement of the car by engaging it.
3. Warm up the Engine
To warm up the transmission fluid, turn on the engine and let it run for a while. Warm fluid flows more efficiently, which helps to remove impurities as the fluid changes.
4. Locate the Transmission Fluid Dipstick
To determine the position of the transmission fluid dipstick, consult the owner’s manual for your car. It is typically identified with a colorful handle or cover and is located close to the engine.
5. Remove the dipstick
Carefully remove the dipstick to check the fluid level and evaluate the dipstick’s condition.
Ensure your car is prepared for the transmission fluid change procedure by following these procedures. The correct planning ensures a successful fluid change, which promotes the longevity and best performance of your transmission system.
The Process of Changing Transmission Fluid
Step 1: Locate the Transmission Fluid Pan and Drain Plug
Finding the gearbox fluid pan and drain plug is the first step in changing the transmission fluid in your car. The drain plug is often located at the lowest position of the transmission fluid pan, a metal container attached to the transmission’s bottom.
To gain precise directions on where to find these components, start by reviewing the manual that came with your car. Once you have a general notion, safely lift your car using jack stands, then crouch down beneath to find the drain plug and pan by sight. Make sure you are equipped to move forward and that you are familiar with their positions.
This procedure lays the groundwork for the subsequent fluid transition process, including adequately draining the old fluid.
Step 2: Drain the Old Transmission Fluid
The next step in changing the transmission fluid in your car is to drain the old fluid after finding the transmission fluid pan and drain plug. Put a drain pan directly beneath the pan to collect the liquid while doing this.
Use an appropriate wrench or socket to unscrew the drain plug, then let the old fluid completely drain out. It can take some time, so be patient. Check the drain plug for any debris or metal shavings once the liquid has completely drained. Before reinstallation, the plug must be cleaned.
This procedure guarantees the removal of tainted fluid to make room for new transmission fluid that will improve the functionality and lifetime of the transmission system in your car.
Step 3: Clean the Transmission Fluid Pan and Magnet
It’s crucial to clean the transmission fluid pan and magnet after draining the old transmission fluid. Take the pan out and thoroughly check it for any residue or debris. Using a suitable cleaning agent, thoroughly clean the pan, making sure to get rid of all traces of the previous fluid.
Look within the pan for any metal shavings or particles using the magnet. Cleanse the magnet and get rid of any impurities. The transmission runs smoothly and is protected from dangerous debris buildup by having a clean pan and magnet. The pan and magnet can be put back in place after being cleaned, which prepares the way for the subsequent steps of the transmission fluid replacement procedure.
Step 4: Install the New Transmission Filter
After cleaning and refitting the transmission fluid pan, installing the new filter is time. The filter is essential in clearing the fluid of pollutants and debris. To begin, gently remove the old filter from its housing, removing all debris.
Install the replacement filter after that, ensuring it is firmly in place. For unique installation procedures or torque requirements, consult your vehicle’s owner’s manual or the manufacturer’s instructions. When a transmission filter is installed correctly, clean fluid will flow continuously, enhancing performance and increasing the life of your transmission.
You are now prepared to proceed with the subsequent phases of the transmission fluid change procedure once the new filter has been firmly installed.
Step 5: Reinstall the Transmission Fluid Pan and Tighten the Bolts
Reattaching the pan to the transmission is necessary after cleaning the transmission fluid pan and replacing the filter. Carefully line the pan with the transmission case before tightening the bolts manually.
Gradually tighten them in a crisscross pattern to maintain an even pressure distribution. Avoid over tightening the bolts to prevent damage to the pan or the transmission. Using a torque wrench, tighten all the bolts to the recommended torque levels specified in your vehicle’s manual.
Reinstalling the pan correctly and tightening the bolts will produce a tight seal, stopping leaks and enabling the transmission to operate at its best.
Step 6: Refill the Transmission with New Fluid
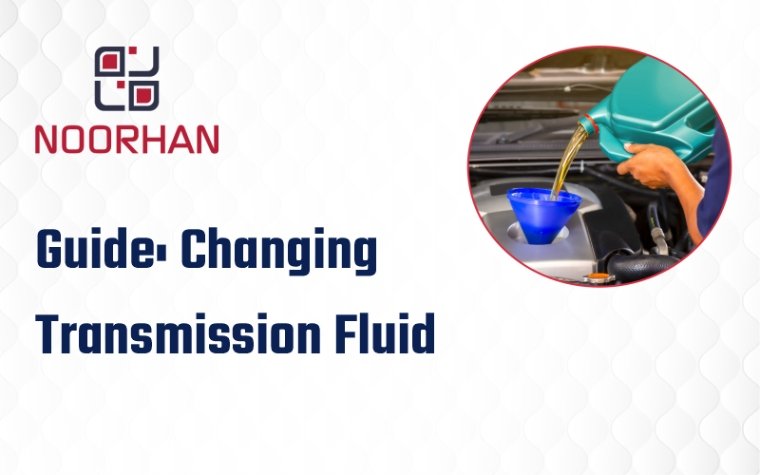
It’s time to reinstall the transmission fluid pan and then add new fluid to the transmission. Find the transmission fluid dipstick, then pour the fresh fluid into the dipstick tube using a funnel. Add the liquid gradually, using the dipstick to check the level as needed.
Take your time, and don’t fill it up too much. To ensure a smooth transmission, the right fluid must be used, and the level must be maintained. Place the dipstick firmly back in place once the fluid level is within the advised range.
This procedure guarantees that your transmission is refilled with clean fluid, enhancing performance and extending the life of the transmission.
Step 7: Check the Transmission Fluid
Level and Adjust if Necessary
Checking the fluid level and making any required adjustments after adding new fluid to the transmission is crucial. Let the fluid flow for a few minutes on the engine. After that, find the gearbox fluid dipstick and take it out.
Reinstall it completely after cleaning it with a cloth. Remove it once more, then verify the dipstick’s fluid level reading. Ensure the level is within the permitted range as stated in the owner’s manual for your car.
If the level is low, gently add more liquid and recheck until it is correct. The proper fluid level must be maintained for optimum gearbox operation and to prevent future problems.
Step 8: Test Drive and Verify Proper Transmission Operation
It’s essential to test drive your car after changing the transmission fluid to ensure everything is working correctly. Take a brief drive on various roads to ensure seamless shifting and peak performance.
When shifting gears or accelerating, pay attention to strange vibrations, noises, or hesitations. If one is available, watch the gearbox fluid temperature gauge to ensure it stays within the acceptable range.
After changing the gearbox fluid, you should adequately test your car to ensure everything works as it should and to give you peace of mind that it works at its best.
Tips and Precautions for Changing Transmission Fluid
- Safety first! Ensure the car is parked on a level surface, that the parking brake is applied, and that you wear the appropriate protective gear, such as gloves and safety glasses.
- Refer to your vehicle’s manual for exact directions, fluid types, and capacity. Procedures and requirements may vary between cars.
- Give the procedure enough time. Rushing increases the risk of errors, improper fluid drainage, and overfilling.
- To accurately facilitate the fluid change operation, use suitable instruments such as a socket set, torque wrench, and a funnel.
- The old fluid should be disposed of properly at a recycling facility or other approved location. Never spill it on the ground or down drains.
- To maintain your gearbox functioning at its best, follow the manufacturer’s advised service intervals.
- If unsure, get professional assistance to guarantee the project is completed correctly. This is especially important if you need more experience or run into problems.
Where can you Buy Engine Part in Dubai?
Engine Part are available at different suppliers and dealers of auto spare parts in Dubai. Noorhan is amongst the leading brands that deal with genuine auto spare parts and aftermarket parts for different car brands, including BMW, Mercedes, Audi, Porsche, Honda, Toyota, Nissan, Mazda, Jeep, Ford, and other Japanese, European, American, Korean, luxury cars brand.


