How To Change Engine Oil - A Step-By-Step Guide
Table of Contents
- Why Are Regular Engine Oil Changes Important?
- What You’ll Need for an Oil Change
- Prepare Your Vehicle: Safety Measures and Precautions
- The Process for Changing Engine Oil
- Step 1: Locate the Oil Drain Plug and Position the Vehicle
- Step 2: Draining the Old Oil – Removing the Oil Drain Plug and Letting it Drain Completely
- Step 3: Changing the Oil Filter-Removing the Old Filter and Installing a New One
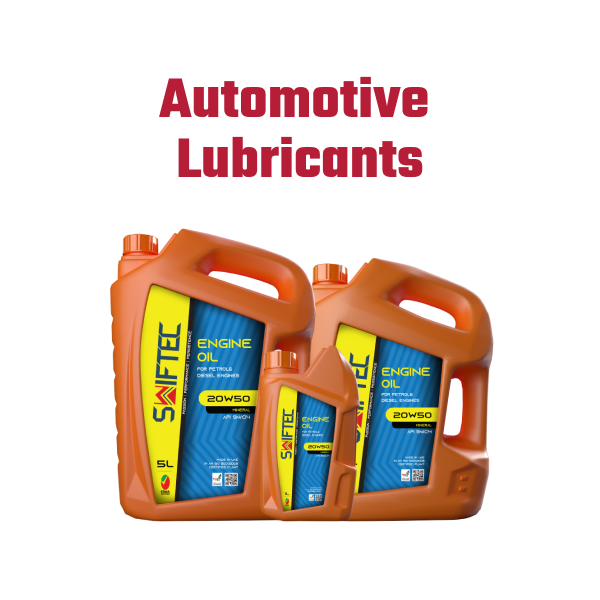
- Step 4: Adding Fresh Oil – Selecting the Right Oil and Pour it into the Engine
- Step 5: Checking the Oil Level and Adjusting if Necessary
- Step 6: Cleaning Up and Proper Disposal of the Old Oil
- Additional Tips and Maintenance Considerations
- Where can you Buy Engine Part in Dubai?
Why Are Regular Engine Oil Changes Important?
Routine engine oil changes are essential for your car to operate at its best and last as long as possible. Engine oil is essential for lubricating the moving elements of the engine, lowering friction, and avoiding excessive wear and tear. The oil loses its efficacy as it degrades, gets clogged with particles, and breaks down over time. This may result in decreased engine performance, more fuel consumption, and even possible engine component damage. Maintaining a regular oil change schedule makes sure that the engine is always supplied with clean, effective oil, boosting smooth operation, preventing early engine wear, and extending the lifespan of your car as a whole. Regular oil changes are a straightforward but crucial maintenance operation that may greatly improve the dependability and performance of your car.
Recommend Read: How does a Car Water Pump work?
Gathering the Tools and Materials: What You'll Need for an Oil Change
Gathering the necessary equipment and supplies is one of the most important steps in preparing for an oil change. An organized procedure can be achieved by having everything ready before you begin. The following are the necessities you will require:
1. New oil filter –
Purchase the proper oil filter for your car make and model if you need a new one.
2. Engine oil –
To find out the appropriate type and amount of oil, consult the owner’s manual for your car.
3. Oil filter wrench –
This device makes it easier to remove the old oil filter safely.
4. Oil drain pan –
While the oil is drained, use a pan or other container to catch the used oil.
5. Funnel –
Using a funnel makes adding fresh oil to the engine simpler and cleaner.
6. Gloves and safety glasses –
to Protect yourself from spills and debris
7. Oil filter drain tool –
This device aids in draining the filter housing in automobiles with filter drain plugs.
8. Ratchet or wrench –
Use the proper instrument to remove the oil drain plug.
If you assemble these tools and materials in advance, you’ll be well-equipped to handle the oil change procedure effectively and without any delays. Remember to recycle the spent oil and filter by bringing them to a recognized facility.
Prepare Your Vehicle: Safety Measures and Precautions
Follow these crucial safety procedures and safeguards when getting your car ready for an engine oil change:
- To guarantee stability, park on a level surface and apply the parking brake.
- Give the engine some time to cool down to prevent burns from hot components.
- Collect the required equipment and supplies, including gloves and safety glasses.
- To collect used oil and avoid spillage, use an oil drain pan.
- Follow the manufacturer’s recommendations to lift the car with jack stands or ramps safely.
- Before climbing under the car, make sure everything is solid and secure.
- Make sure the engine is completely off before removing the ignition key.
- Always consult your vehicle’s owner’s manual for detailed safety recommendations and precautions.
- Respect local restrictions while disposing of spent oil and filters.
The Process for Changing Engine Oil
Step 1: Locate the Oil Drain Plug and Position the Vehicle
Step 1 of changing an engine oil requires correctly locating the oil drain plug and situating the car. The engine oil pan’s bottom is normally where the oil drain plug is found. To prevent burns, ensure the car is parked on a level surface, and the engine has cooled down.
First, assemble the required tools, such as a socket set or wrench that fits the oil drain plug. Using the proper tool, carefully remove the drain plug. Hot oil should be avoided since it could spray. Remove the plug gradually to let the oil pour into the drain pan. Using the same tool, tighten the drain cap once the oil has completely drained.
Lastly, remove the drain pan from under the car before continuing with the oil-changing procedure.
Step 2: Draining the Old Oil – Removing the Oil Drain Plug and Letting it Drain Completely
Removing the oil drain stopper and letting the old oil completely drain is step 2 in the engine oil change procedure. After placing the car and finding the drain plug, carefully remove it using a wrench or socket set.
Place a drain pan underneath to collect the used oil. Make sure the oil slows to a dribble before letting it drain out completely. Check the drain plug for damage, and if necessary, replace the washer.
Reattach the drain stopper firmly to stop leaks after completely drained. You’ve effectively drained the old oil by finishing this step, setting yourself up for the remaining steps of the oil-changing procedure.
Step 3: Changing the Oil Filter-Removing the Old Filter and Installing a New One
Installing a new oil filter after removing the old one is step 3 of changing an automobile’s engine oil. Find the oil filter, which is normally close to the engine, after draining the old oil. To remove the old filter, use an oil filter wrench to pull it apart.
Ensure the drain pan is set up underneath to collect any leftover oil. After cleaning the mounting surface, apply fresh oil in a thin layer to the new filter’s rubber gasket. By hand, put in the new filter and snug it up. Avoid tightening too much. You have successfully changed the oil filter, a crucial step in the oil-changing procedure, by finishing Step 3.
Step 4: Adding Fresh Oil – Selecting the Right Oil and Pour it into the Engine
The fourth step in changing an automobile’s engine oil includes adding new oil by picking the appropriate type and pouring it into the engine. After changing the oil filter, it’s time to refuel the engine with fresh oil.
Determine the recommended oil type and quantity by consulting the owner’s manual for your car. Remove the oil filler cap from the engine’s top, then choose the proper oil. Pour the new oil into the engine slowly using a funnel to prevent leaks. Be careful not to overfill, as this may result in harm.
Reattach the oil filler cap safely after the appropriate amount has been injected. You have successfully added fresh oil to the engine by completing Step 4, providing proper lubrication and operation.
Step 5: Checking the Oil Level and Adjusting if Necessary
Checking and adjusting the oil level is step 5 of changing an automobile’s engine oil. After adding fresh oil, it’s crucial to check that the oil level is within the advised range. The dipstick should be taken out, cleaned, and fully reinserted.
After that, remove the dipstick and compare the oil level to the markings or indicators. If the level is lower than the advised range, gently add extra oil and recheck. Alternatively, if the level is too high, add more oil to bring it down. Continue till the oil level is at its ideal.
Step 5 ensures that the engine has the appropriate volume of oil for effective lubrication and operation.
Step 6: Cleaning Up and Proper Disposal of the Old Oil
Cleaning up and properly discarding the old oil are steps in changing a car’s engine oil in step 6. After the oil change procedure, cleaning up any spilt oil and properly disposing of the spent oil is crucial.
Use rags or other absorbent items to clean up oil drippings or spills from the engine and surrounding regions. Put the used oil in a suitable container and secure the lid before moving it from the drain pan.
Make sure the container is sealed tightly and labelled. Take the used oil to a recycling facility or an auto parts business that takes used oil to dispose of it properly. By finishing Step 6, you not only maintain a clean working environment, but you also help to safeguard the environment by properly disposing of used oil.
Additional Tips and Maintenance Considerations
While changing a car’s engine oil, keep the following additional advice and maintenance issues in mind:
1. For exact instructions and suggested oil change intervals, consult the owner’s handbook.
2. Check the housing of the oil filter for leaks or damage.
3. Check the levels of additional fluids, such as brake and coolant, and top them off as necessary.
4. place a drip tray or piece of cardboard under the car to capture any leftover oil.
5. For the purpose of maintenance, keep track of the miles and the date of the oil change.
6. Use an auto parts store or a recycling facility to properly dispose of the spent oil.
7. To guarantee your safety when changing your oil, think about using gloves and safety glasses.
8. Verify that all connections, including the oil drain plug and oil filter, are tightly fastened by checking them twice.
9. After changing the oil, listen for any unusual noises or leaks in the engine.
10. Keep up a routine maintenance program to keep the engine in your car working smoothly.
Where can you Buy Engine Part in Dubai?
Engine Part are available at different suppliers and dealers of auto spare parts in Dubai. Noorhan is amongst the leading brands that deal with genuine auto spare parts and aftermarket parts for different car brands, including BMW, Mercedes, Audi, Porsche, Honda, Toyota, Nissan, Mazda, Jeep, Ford, and other Japanese, European, American, Korean, luxury cars brand.


